# Importing Demo Content
### One-Click Demo Import
After activating the **Flexivi** child theme, you'll notice a new menu item labeled **Flexivi Demo Importer** in your WordPress dashboard. To import the demo content:
1. Click on the **Flexivi Demo Importer** menu item.
2. **Select Import Options**: On the import page, you'll see various import options. If you're setting up a fresh website, ensure all options are selected to import the complete demo content.
3. Click the **Import Demo Content** button to start the process.
The import process may take some time, depending on your network speed and server performance. Please be patient and allow it to complete without interruption.
After the import finishes, you'll see a message confirming its success. To remove the import functionality from your site, click the **Remove Demo Content & Import Function** button. This action deletes the import files but keeps the imported content intact.
All done! Your demo content has been successfully imported, and your site is now set up and ready for customization.
{% hint style="info" %}
If you're experiencing any issues during the import process, please don't hesitate to reach out to us. We're [here](https://developerinfotech.com/contact/) to help and will do our best to assist you.
{% endhint %}
***
### Manual Demo Import
After activating the **Flexivi** child theme, locate the **`Flexivi Supplementary Files.zip`** on your computer and extract it to access the individual files..
#### **1. Upload the JSON files**
1. Navigate to **Divi > Theme Customizer**. Click on the **import/export options** (up/down arrow).\
Click on **Import** and upload **Flexivi-Customizer-Settings.json.**
2. Navigate to **Divi > Theme Options**. Click on the **import/export options** (up/down arrow).\
Click on **Import** and upload **Flexivi-Theme-Options.json.**
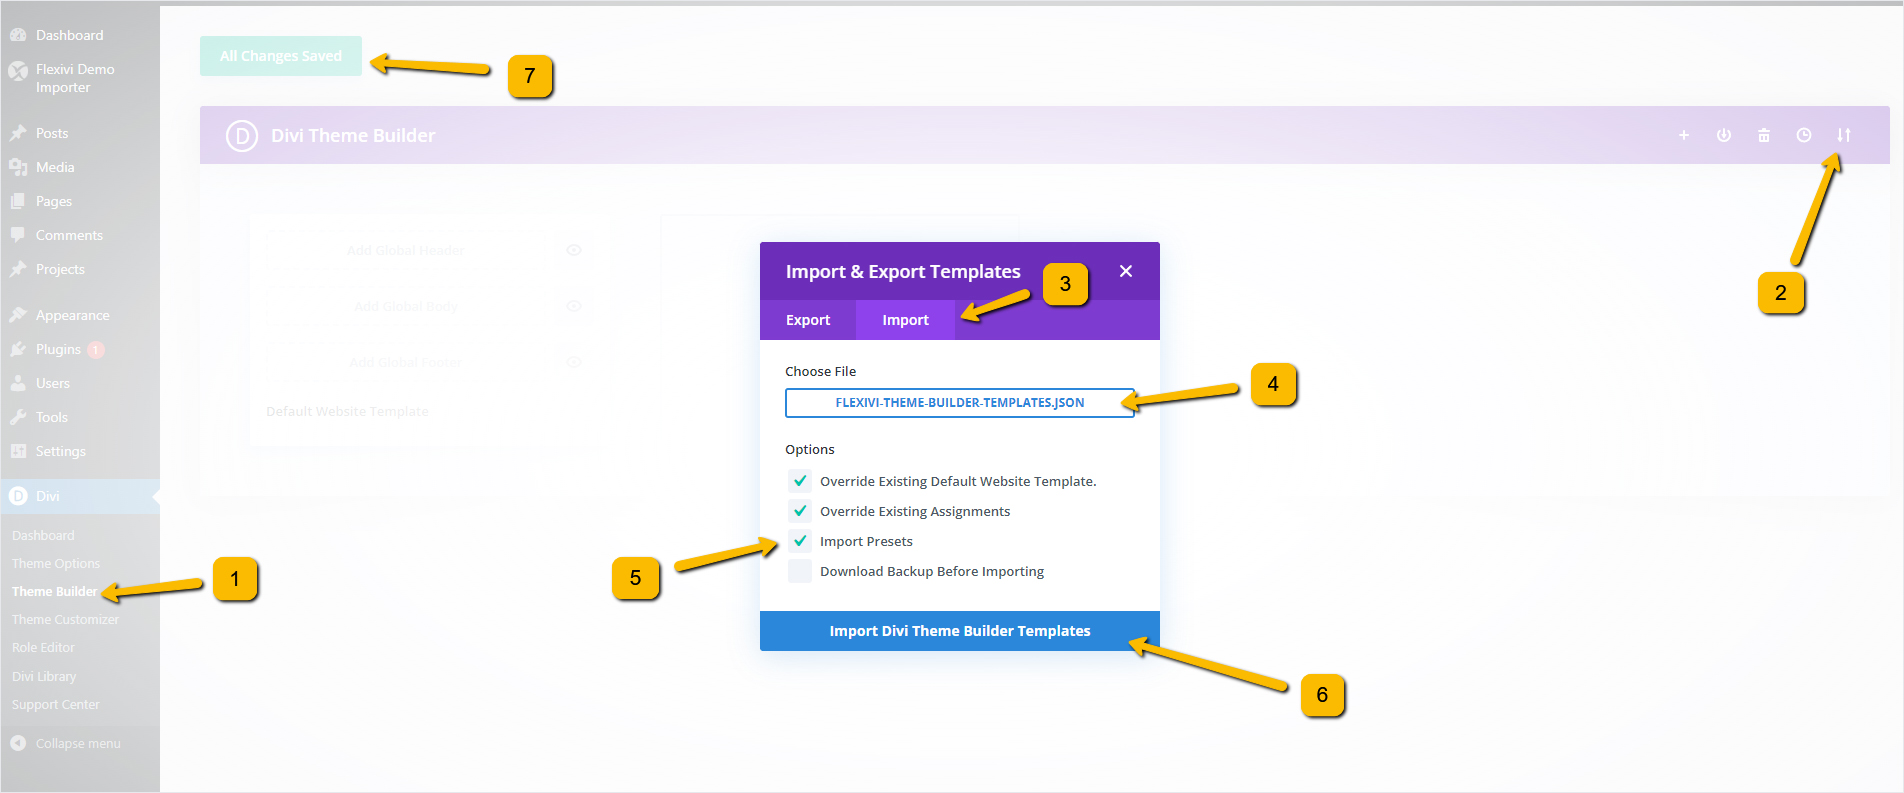
3. Navigate to **Divi > Theme Builder**. Click on the import/export options.\
Click on **Import** and upload **Flexivi-Theme-Builder-Templates.json.** Make sure that **Import Presets** option is checked.
4. Navigate to **Divi > Divi Library**. Click on the import/export options.\
Click on Import and upload **Flexivi-Library.json.** Make sure that **Import Presets** option is checked.
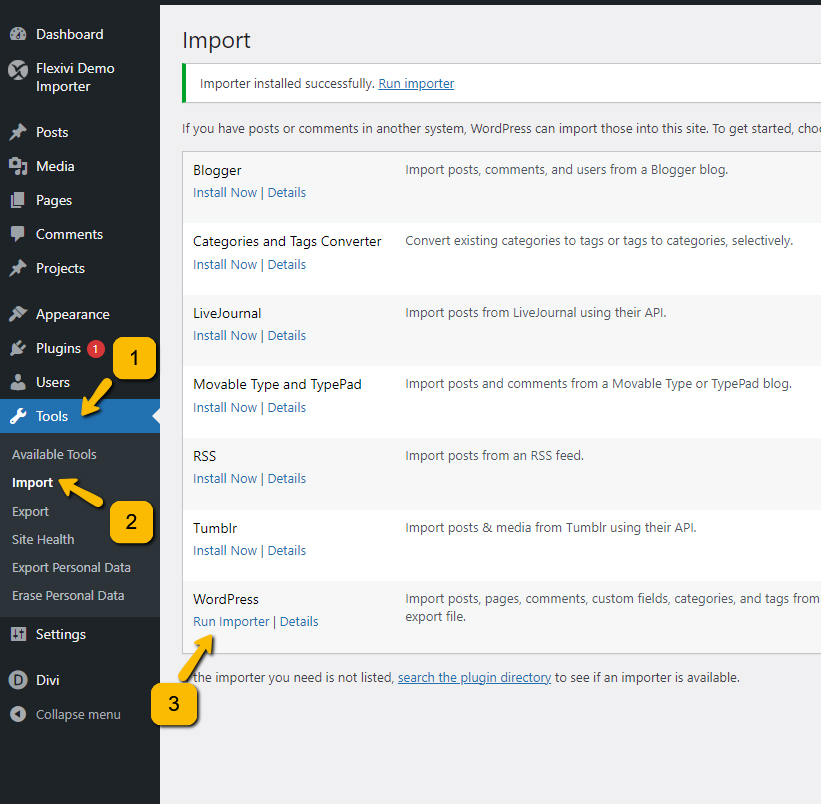
#### 2. Upload The Posts
* Go to **Tools > Import > Wordpress > Run Importer.**
* Choose the **posts.xml** file, then click on the **upload file and import** button.
* Assign the author if you want, then check the **Download and import file attachments** and hit **submit** button.
#### **3. Add the Pages**
Go to Pages > Add New. Give your page a name for example Home. Click on Use Divi Builder Click on choose a premade layout Go to the tab Your Saved Layouts Here you will find all the pages from the demo. Load the Home page and publish it. To add the other pages as in the demo you do the same steps.
* Go to **Pages > Add New.**
* Give your page a **Name** for example Home.
* Click on **Use Divi Builder.**
* Click On **Browse Layouts.**
* In **Your Saved Layouts** tab, Select **Pages** from categories and click on the **Page Layout** like Home.
* Then click on **Use This Layout.**
* **Publish** your page.
* Follow the same steps for all pages.
#### **4. Add the Projects**
* Navigate to **Projects > Add New Project** in your Wordpess Dashboard.
* Give a **Name to** the project and Click on **Use Divi Builder.**
* Click On **Browse Layouts.**
* In **Your Saved Layouts** tab, Select **Projects** from categories and click on the **Project Layout**.
* Then click on **Use This Layout.**
* **Publish** your project.
* Follow the same steps for all projects.
**Add Project Categories**
* Go to **Projects > Categories.**
* Input Name and other Details, then click on **Add New Category** button.
* Assign the Category to the Projects.
#### 5. Create Menus
* First, navigate to **Appearance > Menus** in your WordPress dashboard.
* Input Menu **Name** and adjust the menu setting as per your requirement and Hit **Create Menu** button.
* Select The Pages and add them to menu.
* Save the menu.
#### 6. Set the Home Page
* Go to **Settings > Reading** in your Wordpress Dashboard.
* Check **A Static Page** option.
* Then **Select** The Home page and **save** the changes.
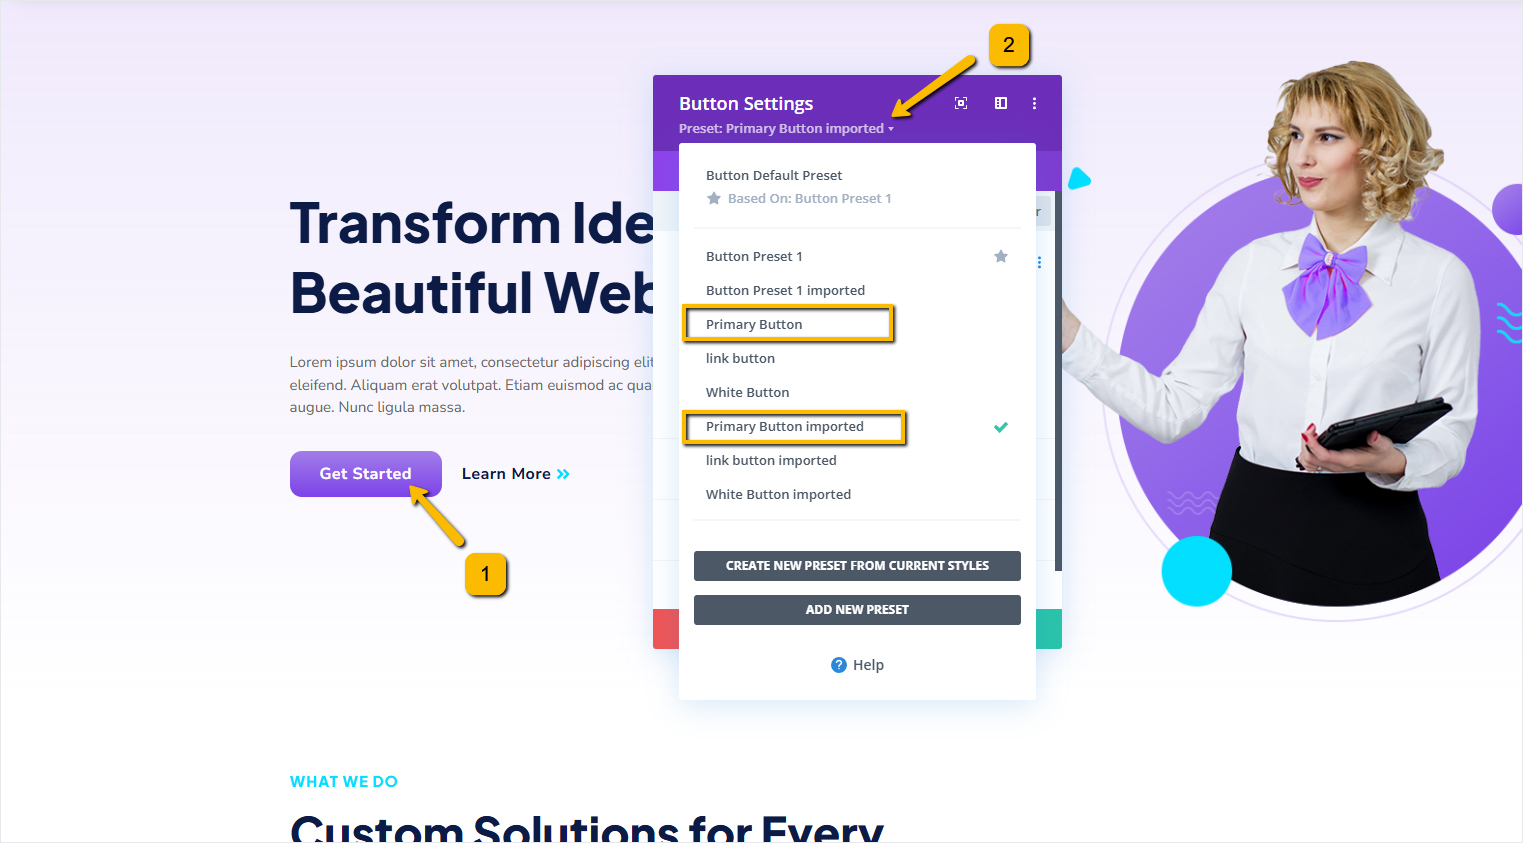
#### 7. Important note for the presets
When you import Demo content manually, the Divi Presets get duplicated. so you have to update both presets if you are updating the preset.. or you can set main preset to the modules and then delete the duplicated preset.